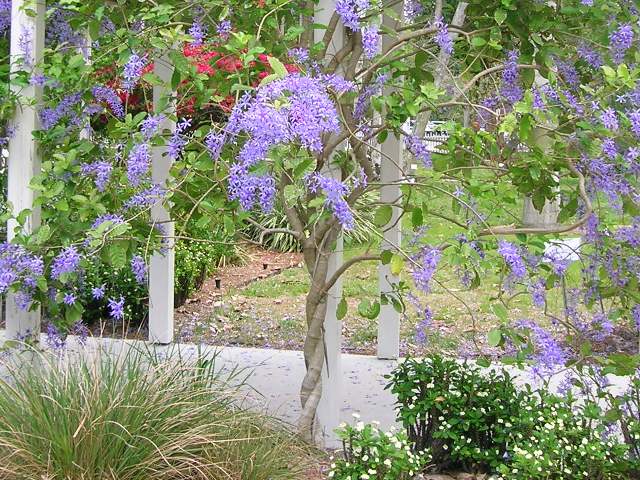
The Sandpaper vine's scientific name is Petrea volubilis. Unlike the white Porana volubilis (which I have in a container trellis), this vine isn't aggressively twining at all. Petrea volubilis's other common names are Queen's Wreath, Purple Wreath, Blue Bird Vine and Fleur de Dieu (Flower of God)).
So when I found that my favorite garden shop in the south, Robelle Garden Center had it, I was ecstatic. It was only accidental though because I was looking for the Bauhinia kockiana at that time. I settled to buying just one Sandpaper Vine.
After a couple of weeks, I transferred the vine in a big pot. The seedling bag I got it with seemed to be small. I wanted it to grow quickly and become robust because I had intentions of propagating it.
Here is the Sandpaper vine in a bigger garden clay pot.
Cutting the Branch of the Petrea Volubilis or Queen's Wreath or Purple Wreath
After a couple more weeks, I knew it grew a little more and has settled in the garden clay pot. I wanted the Sandpaper vine to appear more of a tree than a bush, much like the first photo above. Therefore I concluded that removing extra branches at or near the base would be one way to have a compact base.
The photo below shows a zoomed in image of the Sandpaper vine plant in the garden clay pot.
Notice that the plant has two main branches. I wanted to retain the two and remove extra side branches. So I cut the extra branch on the left branch at a point shown by the red line.
Planting the Petrea Volubilis or Sandpaper Vine Stem Cutting
The cut branch of the Sandpaper vine allowed me to try a propagation technique using a humidity chamber. I've used the misting method for hard to propagate cuttings like the Rangoon Creeper. But I thought of using the humidity chamber method this time.
The humidity chamber I used was simply a plastic bag that covered the Sandpaper Vine cutting in the seedling bag. Here are the steps I followed.
Materials
- Seedling bag
- Potting medium or soil mix of your choice
- Sandpaper Vine (Petrea volubilis) stem cutting with two nodes
- Large clear or translucent plastic bag
- Short Tie wire
Procedure
- Prepare moist (not soggy) potting medium in a seedling bag.
- Cut the leaves of a four-leaf stem cutting in half. A four-leaf stem cutting would have two nodes. Cutting the leaves in half prevents the excessive transpiration of water.
- Plant the stem cutting in the potting medium burying the stem up to 1 1/2 inches.
- Put the planted stem cutting inside a large plastic bag as shown below.
- With a piece of tie wire, tie the top of the plastic bag to close and seal it. Position the humidity chamber in partial shade. This stem cutting gets early morning sun only and is in shade (but bright light) for the rest of the day. I placed the humidity chamber in the nursery racks I built.
- Every three days, untie the wire and open the plastic bag. Look for browned or blackened leaves. If there is partial discoloration, cut away the browned or blackened parts of the leaves with a pair of sharp pruning shears or scissors. If totally discolored, remove them.
Also remove any dropped or detached leaves. These debris invite mold or fungus growth if left inside the bag. If all the leaves dropped, then the stem cutting has failed.
- After inspecting and the stem cutting is still fine, close the plastic bag with a tie wire. Do not mist or water the stem cutting.
Notice that I placed other stem cuttings inside the plastic bag as well. There is a Bauhinia kockiana cutting and several rose cuttings.
- The stem cutting would root after three weeks. It would likely have produced a new pair of leaves by then.
- Place in partial shade and gradually to direct sunlight until ready for replanting.
In summary, here's a video clip of the steps for your reference:


Go ahead, post your comment below!